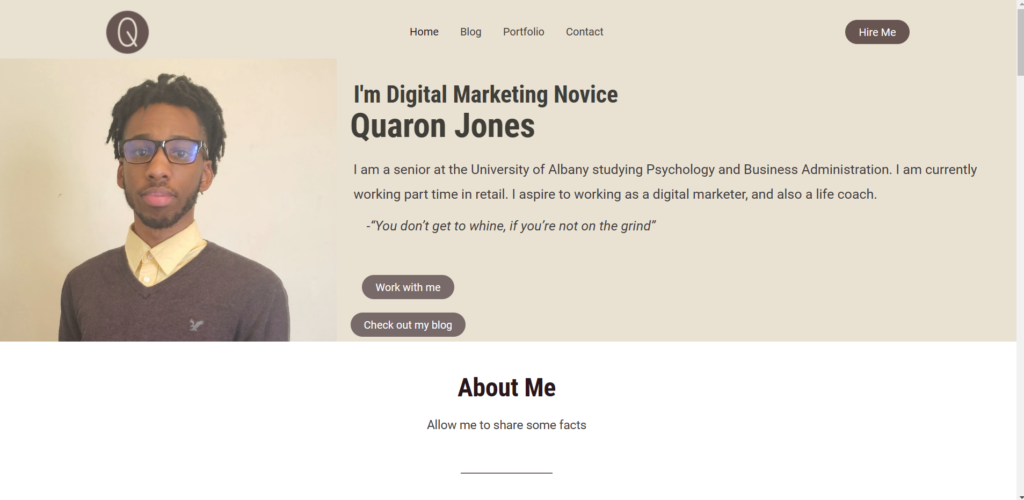
Now that I knew the fundamentals of marketing, I was way too excited over the upcoming module. I made headway into it, in which I learned to build my own website! Some of the coolest things about the business world to me, are telling people that you have a website, and whipping out business cards to give to people. You cannot be a digital marketer without learning about the basic building block of the digital world, which is a website. Most of digital marketing involves bringing potential customers to one. This week (Dec 15th 2022) I built my website on WordPress. I’ve learned that WordPress is the most widely used content management system with 60 million websites using it.
Having a website has become increasingly important for businesses, in order to establish a strong online presence. With the availability of website builders, it was pretty simple and affordable to create a website. In this post, I’ll show you through the three simple steps to creating a website using HostGator, WordPress, and Elementor.
Step 1: Buy a Domain and get Hosting
The first step in creating a website is to purchase a domain name and hosting. Web hosting the online service that makes your website’s content accessible to the internet. For this, I used HostGator. To get started, simply hover over “Hosting” on the HostGator website and click on “Shared Hosting”. From there, select the plan that fits your needs. I went with the 12 month Hatchling Plan, which comes with a free domain name (your website’s name). I chose my name; quaronjones.com.
Step 2: Installing WordPress
Installing WordPress is simple with HostGator. It makes this process easy by having a WordPress installation button on their control panel. After entering your domain name, site name, and description, create an admin account and hit the install button. Wait for the installation to complete. When you receive your installation confirmation, check your site in about 15 minutes. If you encounter an error message, wait up to 24 hours and refresh the page. Your site should now be live!
Step 3: Design the Website with Elementor
I used Elementor to design my website. It is a popular WordPress plugin that has a drag-and-drop interface, making it easy for anyone to create a well designed site (there was no coding necessary). To get started, install the Elementor plugin from the WordPress plugin tab, then go to the “Pages” section in your WordPress dashboard and click “Add New”. On the page editor screen, you will see an “Edit with Elementor” button. Click on it to open the Elementor page builder.
You can choose a template or start from a blank page and use Elementor to add content by adding text, images, buttons, sections, widgets, and other elements. I’d recommend watching a video on YouTube if you need help. I watched Tyler Moore. Finally, when you are satisfied with your website, publish it.
According to Senator We Run Ads on YouTube, I was supposed to finish this process anywhere from 1-4 days, but me being the perfectionist that I am, it took me THREE WEEKS to design my website! I was obsessed with finding a decent color palette and adding the right elements to my site in order to satisfy me. I was supposed to make a simple site (and it still is rather simple), but I felt like this could turn into so much more. So I added a blog section and portfolio, because I have faith that my website will grow.
Learning website building is an essential step in the world of digital marketing. With the practical knowledge that I acquired from the recent module; I was able to build my own website using WordPress. The feeling of having a website is amazing and further strengthens my passion for digital marketing. This was my first practical skill that I learned. This week has been a significant milestone in my digital marketing journey. Next, HTML! I am excited to explore and develop my skills in this field!

